
Homemade Vanilla Ice Cream (No Ice Cream Maker Needed)
There’s something undeniably magical about vanilla ice cream. It’s nostalgic and comforting, yet endlessly versatile. Whether served in a cone, paired with pie, or eaten straight from the bowl, vanilla ice cream is a timeless treat. And the best part? You don’t need an ice cream machine to enjoy a creamy, dreamy, homemade version right from your freezer. With just three simple ingredients and a few hours of chilling time, you can create a dessert so rich and flavorful that it puts store-bought versions to shame.
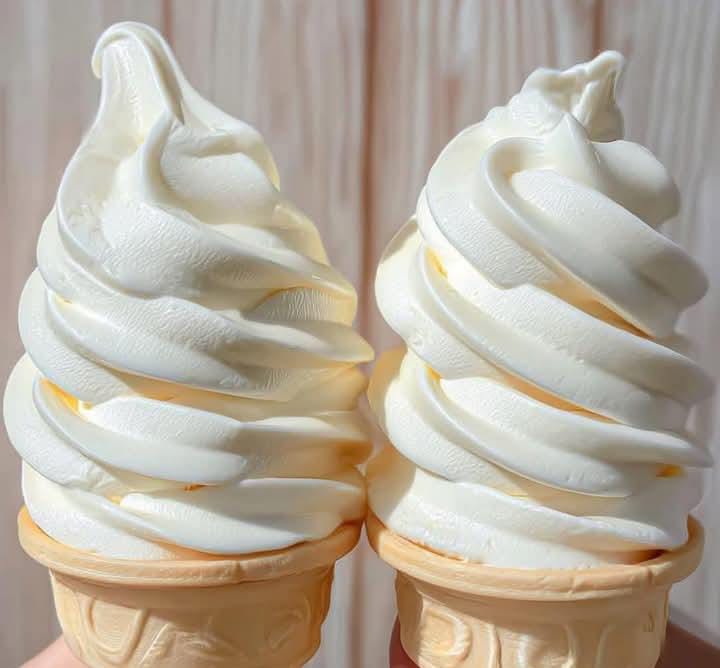
This no-churn vanilla ice cream is made using whipping cream, sweetened condensed milk, and pure vanilla extract. It’s smooth, luscious, and packed with that classic vanilla flavor everyone loves. Perfect for hot summer days, elegant dessert platters, or spontaneous midnight cravings, this recipe delivers every time.
Why You’ll Love This Recipe
Homemade vanilla ice cream without an ice cream maker sounds too good to be true—but it’s not. This recipe works because of the magical combination of whipped cream and sweetened condensed milk. The cream provides structure and airiness, while the condensed milk adds sweetness and silkiness. Together, they mimic the churning process by trapping air and preventing icy crystals from forming.
It’s also completely customizable. You can add mix-ins like chocolate chips, crushed cookies, swirls of caramel, fresh fruit, or even a splash of liqueur. Or keep it simple and let the vanilla shine. Either way, it’s a guaranteed crowd-pleaser.
Ingredients
2 cups (1 pint) whipping cream or heavy cream, well chilled
1 can (14 oz) sweetened condensed milk
1 teaspoon vanilla extract
Optional additions:
½ teaspoon vanilla bean paste
Pinch of salt for flavor depth
Mix-ins: crushed cookies, chocolate chips, berries, caramel sauce, chopped nuts
Step-by-Step Instructions
Step 1: Chill Your Equipment
For best results, place your mixing bowl and beaters in the freezer for 10–15 minutes. Cold equipment helps the cream whip up faster and hold its structure.
Step 2: Whip the Cream
Pour the chilled whipping cream into the cold mixing bowl. Beat on medium-high speed using a hand mixer or stand mixer until stiff peaks form. This usually takes 3–5 minutes. The cream should hold its shape and form peaks that stand up on their own when you lift the beaters.
Step 3: Add Vanilla and Sweetened Condensed Milk
In a separate bowl, combine the sweetened condensed milk and vanilla extract. Stir well until smooth. If using vanilla bean paste or a pinch of salt, add them now.
Step 4: Fold Gently
Add the vanilla mixture to the whipped cream. Gently fold the two together using a spatula. Be careful not to deflate the whipped cream—use a light hand and scoop from the bottom upward in a gentle folding motion. Continue until fully combined.
Step 5: Transfer to Container
Pour the ice cream mixture into a freezer-safe container. A loaf pan works perfectly, but any container with a lid will do. Smooth the top with a spatula.
Step 6: Freeze
Cover the container with plastic wrap or a lid and place it in the freezer. Freeze for at least 6 hours, preferably overnight, until fully set.
Step 7: Scoop and Enjoy
When ready to serve, let the ice cream sit at room temperature for 5–10 minutes to soften slightly. Scoop and enjoy in a bowl, cone, or however you like.
Serving Suggestions
Homemade vanilla ice cream is the ultimate blank canvas. It’s perfect on its own but also pairs beautifully with so many other desserts.
Top with fresh strawberries or a warm fruit compote
Serve with brownies, pies, or cookies
Drizzle with chocolate, caramel, or berry sauce
Add a handful of sprinkles, crushed peanuts, or chopped toffee
Layer into a sundae with bananas, whipped cream, and a cherry
Creative Variations
This vanilla base is perfect for flavor experiments. Try these ideas:
Chocolate Swirl Vanilla
Fold in ribbons of chocolate syrup or ganache before freezing.
Cookies and Cream
Add crushed chocolate sandwich cookies like Oreos for a fun, crunchy texture.
Vanilla Bean Dream
Use half vanilla extract and half vanilla bean paste for intense flavor and those signature vanilla specks.
Nutty Delight
Mix in chopped pecans, walnuts, or almonds. Toasted nuts bring extra depth.
Berry Burst
Stir in chopped fresh strawberries, raspberries, or blueberries.
Mocha Magic
Add a tablespoon of instant espresso powder and chocolate chips for a mocha twist.
Mint Chip
Add peppermint extract and dark chocolate chunks for a refreshing version.
Storage Tips
Homemade ice cream is best within the first two weeks of freezing, although it can last up to one month. Store it in an airtight container, and place a piece of parchment paper or plastic wrap directly on top of the ice cream to prevent freezer burn.
Texture Tip
If your freezer is very cold, the ice cream may become very firm. Let it sit at room temperature for a few minutes before scooping.
Make-Ahead Option
You can prepare the ice cream mixture and store it in the freezer up to one month ahead of time. It’s a great option for parties or holidays when you want to get ahead on prep.
Nutrition Information (per ½ cup serving)
Calories: 220
Fat: 14g
Carbs: 20g
Sugar: 18g
Protein: 3g
This is an estimate and may vary depending on mix-ins and exact ingredient brands.
Frequently Asked Questions
Can I make this with light cream or half-and-half?
For best texture, stick with heavy whipping cream. Lighter creams won’t hold air as well and could result in icier texture.
Can I use flavored extracts?
Absolutely. Try almond, coconut, hazelnut, or even maple extract for fun twists.
Is this gluten-free?
Yes, this base is naturally gluten-free. Just check labels if adding mix-ins.
Can I make it dairy-free?
Yes, try using full-fat coconut cream in place of heavy cream and sweetened condensed coconut milk.
How long should I freeze it?
At least 6 hours, but 8+ hours is ideal for a firm, scoopable consistency.
What if I don’t have a mixer?
You can whisk by hand, but it takes a lot of elbow grease. A hand mixer or stand mixer is recommended for whipping the cream properly.
Why This Recipe Works
The combination of whipped cream and sweetened condensed milk forms a rich, stable base that mimics churned ice cream. Because the cream is whipped beforehand, it traps air to keep the texture light and smooth. Sweetened condensed milk acts as the sweetener and prevents ice crystals, ensuring that your frozen treat stays creamy and scoopable even days later.
Occasions to Serve It
Birthday parties
BBQs and cookouts
Holiday desserts
Picnic spreads
Dinner parties
Or just a cozy movie night treat
This ice cream also makes an excellent base for ice cream sandwiches, milkshakes, or ice cream cakes.
Pro Tips for Ice Cream Success
Use cold ingredients for the best whip
Don’t overmix when folding
Add swirls or toppings before freezing for the best texture
Store with a barrier (plastic wrap or parchment) to keep the surface fresh
Always let it soften a bit before scooping
Final Thoughts
This Homemade Vanilla Ice Cream recipe is a must-have in your kitchen collection. With no machine required and only three ingredients, it’s as easy as it is delicious. You’ll love how customizable and satisfying it is, whether enjoyed solo or used as a creamy base for all your ice cream dreams.
Once you try it, you’ll never want to go back to store-bought. Keep this recipe on hand, and you’ll always be just a few hours away from cold, creamy bliss in every scoop.