
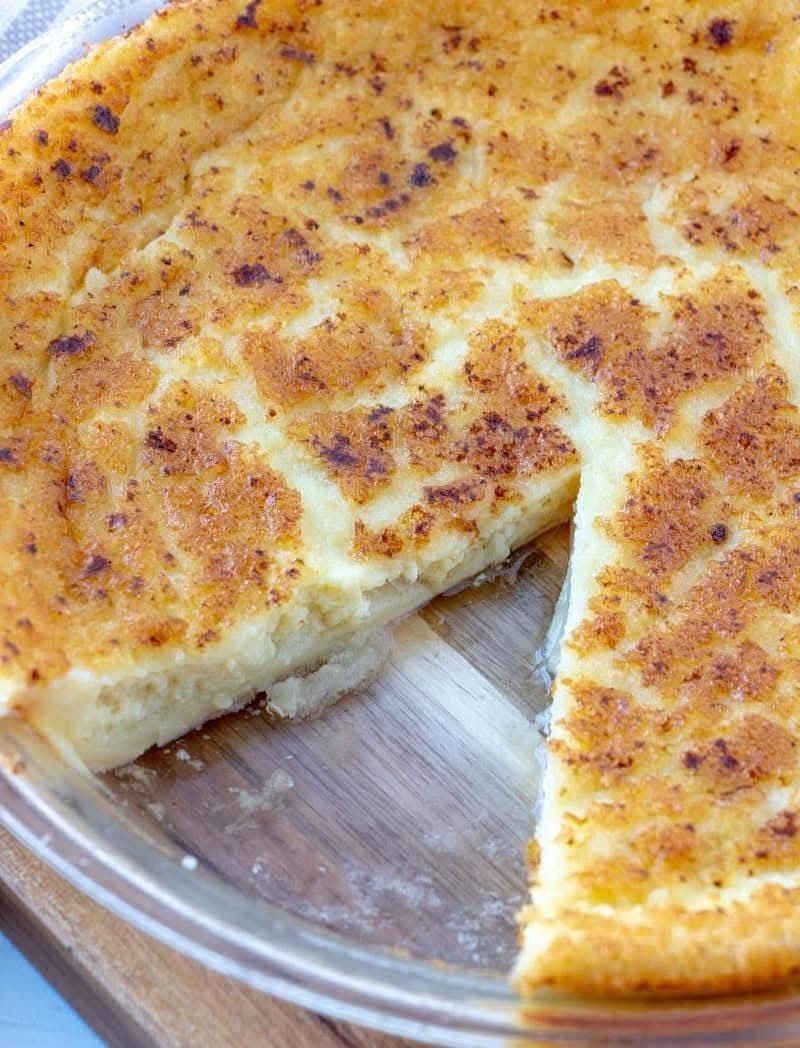
Magic Crust Custard Pie – The Perfect Easy Dessert Recipe
If you’re looking for a simple, delicious, and hassle-free dessert, this Magic Crust Custard Pie is the perfect recipe for you. Unlike traditional pies that require making and rolling out dough, this self-crusting pie magically forms its own crust while baking, giving you a rich, creamy filling with a light, golden base. It’s an easy-to-make dessert that delivers big flavors with minimal effort, making it ideal for busy home bakers, holiday gatherings, or last-minute sweet cravings.
This recipe is not only quick and budget-friendly but also uses ingredients you likely already have in your pantry. The smooth custard texture, combined with the sweet vanilla flavor and a hint of nutmeg, creates a delightful treat that will impress your family and friends. Whether you’re a beginner baker or an experienced cook, this easy custard pie recipe guarantees delicious results every time.
Why You’ll Love This Magic Custard Pie
This self-crusting custard pie is a no-fail dessert that requires only a few simple ingredients but delivers an incredibly rich and creamy texture. Unlike traditional pies, which need a separate crust, this pie’s magic happens in the oven—the flour settles at the bottom to form a light, pastry-like layer while the top becomes silky smooth custard.
This easy homemade pie recipe is perfect for:
- Quick desserts for family dinners
- Holiday gatherings and celebrations
- Potlucks, brunches, and tea time
- A simple yet elegant dessert to impress guests
Unlike store-bought pies, this homemade custard pie is free from preservatives and artificial flavors, ensuring a healthier and fresher taste. If you love classic desserts that are easy to make, this custard pie recipe is a must-try.
Ingredients You’ll Need
To make this easy magic custard pie, you will need:
- 1/4 cup butter, melted but cooled slightly – Adds richness and enhances the pie’s texture
- 4 large eggs – Provides structure and helps create the custard consistency
- 3/4 cup granulated sugar – Adds sweetness and balances flavors
- 1 pinch salt – Enhances the taste and balances sweetness
- 2 cups milk – The base for the creamy custard filling
- 2 teaspoons vanilla extract – Adds warmth and depth of flavor
- 1/2 cup all-purpose flour – Helps form the magic crust
- Nutmeg, for topping – A classic finishing touch that enhances flavor
Step-by-Step Instructions
1. Preheat Your Oven
Preheat your oven to 350°F (175°C). Grease a 9-inch pie dish with butter or non-stick spray to prevent sticking.
2. Blend the Ingredients
In a large mixing bowl, whisk together the melted butter, eggs, sugar, salt, milk, and vanilla extract until fully combined. Slowly add the all-purpose flour, mixing until smooth. For an extra silky texture, you can blend the mixture in a blender or food processor for 20-30 seconds.
3. Pour into the Pie Dish
Pour the custard mixture into the greased pie dish. The batter will be thin, but don’t worry—the magic happens while baking.
4. Sprinkle with Nutmeg
Lightly sprinkle nutmeg over the top of the pie for a warm, slightly spiced aroma.
5. Bake Until Golden
Place the pie in the preheated oven and bake for 45-50 minutes, or until the top is golden and the custard is set. To check if the pie is done, insert a knife or toothpick in the center—it should come out clean.
6. Cool and Serve
Allow the magic custard pie to cool at room temperature for at least 30 minutes before slicing. For best results, chill it in the refrigerator for an hour before serving.
Tips for the Perfect Magic Crust Custard Pie
- Use room temperature ingredients – This helps the custard blend smoothly without lumps.
- Blend the batter well – For the best texture, blend the ingredients to create a smooth and airy custard.
- Don’t overbake – The custard should be firm but still slightly jiggly in the center.
- Let it rest before serving – The pie needs time to fully set, so let it cool before slicing.
- Adjust sweetness – If you prefer a less sweet dessert, reduce the sugar to ½ cup.
Variations and Customizations
- Make it coconut-flavored – Replace half the milk with coconut milk for a tropical twist.
- Add citrus zest – A little lemon or orange zest brightens up the flavors.
- Use almond extract – Swap vanilla extract for almond extract for a nutty flavor.
- Try a chocolate version – Add 2 tablespoons of cocoa powder for a chocolate custard pie.
- Make it gluten-free – Substitute all-purpose flour with gluten-free flour.
Serving Suggestions
This easy custard pie is perfect on its own, but you can enhance the experience by serving it with:
- Whipped cream – Adds a light, airy texture
- Fresh berries – Strawberries, raspberries, or blueberries add freshness
- Caramel or chocolate drizzle – For a decadent touch
- Powdered sugar dusting – A simple yet elegant finish
Storing Leftovers
If you have leftovers (which is rare because this pie disappears fast!), store them properly:
- Refrigerate: Cover the pie with plastic wrap and store in the fridge for up to 3 days.
- Freeze: Wrap slices individually and freeze for up to 2 months. Thaw in the fridge before serving.
Nutritional Benefits
This homemade magic custard pie is not just delicious—it also provides some great nutritional benefits:
- Eggs – A good source of protein, vitamins, and healthy fats.
- Milk – Provides calcium, vitamin D, and essential nutrients.
- Nutmeg – Contains antioxidants and adds a warming, natural flavor.
Compared to store-bought pies, this homemade dessert contains no artificial additives, making it a better choice for a wholesome treat.
Conclusion
Magic Crust Custard Pie is a delicious, no-fuss dessert that forms its own crust while baking, making it one of the easiest homemade pies you’ll ever make. With its rich, creamy filling and light, golden base, this pie is perfect for any occasion, whether you’re hosting a dinner party, celebrating a holiday, or just craving something sweet. Try this classic custard pie recipe today and enjoy a delightful, foolproof dessert that never disappoints!