
Introduction
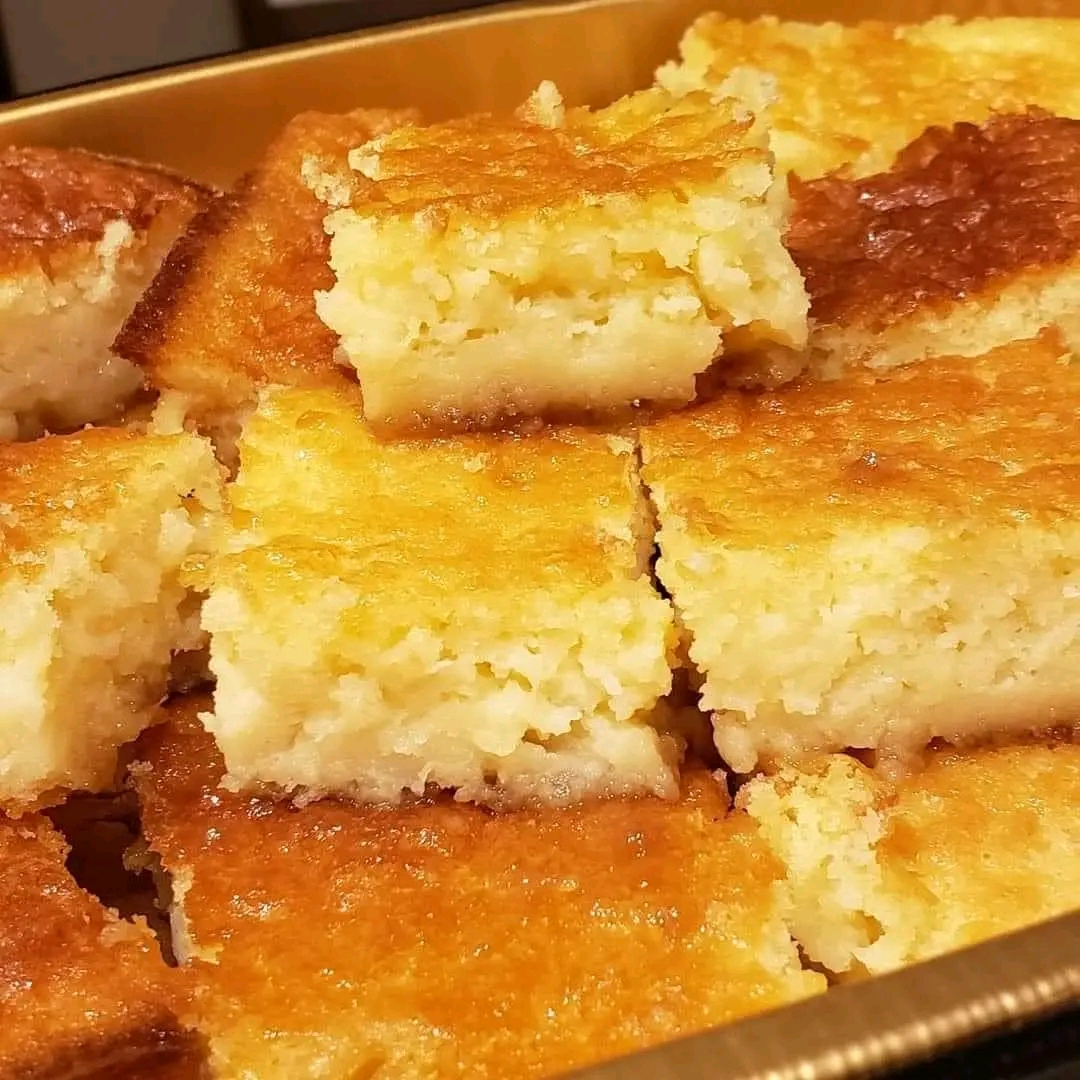
Pineapple cake bars are a delightful cross between a soft cake and a chewy bar, combining the juicy, sweet acidity of pineapple with the tenderness of cake and the convenience of bar form. These dessert bars are ideal for everyday snacks, potlucks, lunchboxes, bake sales, or simply as a treat with tea or coffee. In this article I will walk you through everything you need to know: ingredient choices, variations, step‑by‑step preparation, tips for texture and flavor, storage, and even commercial ideas if you want to scale up your baking.
Why Pineapple Cake Bars?
Many dessert lovers appreciate bars such as brownies, lemon bars, blondies, and cookie bars. But pineapple cake bars offer a refreshing twist: the tropical fruit flavor brightens the richness of the cake base. They offer portability (you can cut into squares or rectangles), are easy to slice and serve, and adapt well to variations (e.g. adding nuts, coconut, or glaze).
Also, the ingredient list is fairly simple and accessible: flour, eggs, sugar, pineapple (fresh or canned), butter or oil, and optional extras. You avoid complicated techniques like folding stiff meringue or multi‑layered piping.
If you get the moisture balance right, the bars are moist but not soggy, tender but sliceable. The trick is to control how much pineapple juice is incorporated and to balance with dry ingredients.
Ingredient Breakdown and Roles
To make great pineapple cake bars, understanding each ingredient’s role is key.
Pineapple
You can use fresh pineapple (peeled, cored, and chopped) or canned pineapple (crushed or tidbits). Fresh gives more vibrant flavor and texture, but the juice must be drained well so you don’t introduce excess moisture. Canned crushed pineapple is convenient, and you can reserve some juice to adjust moisture. Use unsweetened or lightly sweetened pineapple so you control total sweetness.
Sugar
Granulated sugar is standard. You might partially substitute with brown sugar (adds moisture and caramel notes). The amount of sugar affects both sweetness and structure (sugar helps tenderize). If using extra add‑ins (like chocolate chips or nuts), adjust sugar slightly downwards.
Fat (butter or oil)
Butter gives flavor and richness; melted butter is easiest. Oil (e.g. vegetable, canola, or coconut) yields a moister result. You can even do half butter / half oil. If substituting, note that oil is 100% fat vs butter ~80% fat + water, so texture may shift.
Eggs
Eggs provide structure, binding, and leavening (some lift). Use large eggs. If you want a slightly lighter bar, you can use an extra egg white, but don’t overdo (too many eggs lead to a gummy texture).
Flour
All‑purpose flour is typical. You can do part cake flour or pastry flour (lower protein) to create a more tender crumb. If you want gluten‑free, you can use a gluten‑free blend, but then your texture and moisture behavior will change (may require slightly more binder or liquid).
Leavening
Usually a combination of baking powder (and sometimes a small amount of baking soda if pineapple juice is somewhat acidic) is used to help the bars rise modestly (they are not meant to puff like a cake). Be careful not to overleaven, or the bars will dome too much or crack.
Salt
A little salt enhances flavors and balances sweetness.
Optional Add‑ins
- Chopped nuts (walnuts, pecans, almonds)
- Shredded coconut (sweetened or unsweetened)
- Crystallized ginger bits
- White chocolate or dark chocolate chips
- Glaze (powdered sugar + pineapple juice)
- Spices (vanilla extract, a pinch of cinnamon or nutmeg)
Recipe: Pineapple Cake Bars
Here’s a robust recipe for about a 9×13‑inch (23×33 cm) pan yielding roughly 24 bars (depending on cut size).
Ingredients
• 2 cups (250 g) all‑purpose flour
• 2 tsp baking powder
• ¼ tsp baking soda
• ½ tsp salt
• ¾ cup (150 g) granulated sugar
• ¼ cup (50 g) brown sugar, packed
• ½ cup (113 g) unsalted butter, melted (or ¼ cup butter + ¼ cup oil)
• 2 large eggs
• 1 tsp vanilla extract
• 1 cup crushed pineapple, well drained (reserve 2–3 tablespoons of juice)
• Optional: ½ cup shredded coconut, ½ cup chopped nuts, or ½ cup white chocolate chips
• Optional glaze: 1 cup powdered sugar + 1–2 tbsp reserved pineapple juice
Instructions
- Preheat your oven to 350 °F (175 °C). Grease and line a 9×13 pan (or similar) with parchment paper, leaving some overhang for easy removal.
- In a medium bowl, whisk together flour, baking powder, baking soda, and salt. Set aside.
- In a separate large bowl, whisk sugar + brown sugar + melted butter until smooth. Then whisk in eggs and vanilla until combined.
- Stir in the drained crushed pineapple (and optional bits like coconut or nuts) into the wet mixture. If mixture seems too thick, you may whisk in a tablespoon or two of the reserved pineapple juice.
- Gradually fold the dry ingredients into the wet mixture until just combined. Do not overmix.
- Pour batter into prepared pan, smooth the top. You can sprinkle extra coconut or nuts on top for decoration.
- Bake for about 25–35 minutes (depending on oven and thickness) until the edges are golden and a toothpick or cake tester comes out with a few moist crumbs (but not wet batter).
- Let cool in the pan for ~10–15 minutes, then use parchment overhang to lift out onto a wire rack to cool fully.
- If using glaze: whisk powdered sugar with reserved pineapple juice until pourable. Drizzle or spread over cooled bars. Let the glaze set (about 30 minutes).
- Cut into bars (e.g. 4 × 6 or 4 × 8 grid) and serve.
Tips & Troubleshooting
Drain pineapple thoroughly
Excess moisture will cause soggy bars or make them runny in the center. Use a strainer or cheesecloth, press to remove liquid, reserve some juice separately.
Don’t overmix
Once you combine wet + dry, stir until only just incorporated. Overmixing develops gluten and leads to denser bars.
Bake time & pan size
If your pan is shallower (e.g. 8×8 or 9×9), the bars will be thicker and take longer to bake. Use the toothpick test. Also, in different ovens, temperature may vary—check slightly early.
Let bars cool before cutting
Cutting while very warm can lead to messy, collapsing bars. Let the bars cool to nearly room temperature, or refrigerate briefly to firm up before slicing.
Adjust sweetness
If using sweetened pineapple or extra add-ins with sweetness (like white chocolate), reduce sugar by 10‑20 g to avoid overly sweet bars.
Variation ideas
- Coconut pineapple bars: Mix ½ cup shredded coconut into batter + sprinkle on top.
- Nutty twist: Add chopped walnuts or pecans for crunch.
- Spiced pineapple bars: Add ½ tsp ground cinnamon + a pinch of nutmeg or ginger.
- Glazed or frosted: Use pineapple glaze, or a cream cheese frosting (light).
- Tropical fruit blend: Mix small amounts of mango, passion fruit, or shredded freeze‑dried fruit with pineapple.
Nutritional and Serving Info
These bars are rich, so a small piece is satisfying. If you use butter and sugar, expect moderate calories. You can lighten by using oil, reducing sugar, or cutting portion sizes. They pair beautifully with tea, coffee, ice cream, or whipped cream.
Storage & Shelf Life
- At room temperature: keep in a sealed container (or covered pan) for up to 2 days.
- Refrigerated: up to 5 days. Let the bars come toward room temp before serving for better texture.
- Freezing: wrap individual bars in plastic wrap + foil, or slice and interleaf parchment, freeze for up to 2–3 months. Thaw overnight in fridge.
Scaling Up & Commercial Ideas
If you wish to bake and sell pineapple cake bars (e.g. for a small bakery or home business), here are tips:
- Use larger sheet pans (e.g. 18×26) and scale ingredient amounts proportionally.
- Use consistent cutting templates or slicing guides to ensure uniform bar size.
- Package bars in individual boxes or cellophane wraps with branding.
- Consider variations (gluten‑free, vegan, nut‑free) to appeal to niche customers.
- Provide ingredient labels, allergen warnings (pineapple, nuts, dairy, eggs).
- Price your bars factoring in ingredient cost, labor, packaging, and overhead.
Why This Recipe Works
- The drain step ensures moisture is controlled.
- The butter/oil base supports richness and flavor.
- Moderate leavening ensures the bars rise slightly but remain flat enough to slice.
- The optional glaze gives attractive presentation and flavor boost.
- Variations let you adapt to preferences or differentiate in a market.
Frequently Asked Questions (FAQ)
Q: Can I use pineapple juice instead of crushed pineapple?
You could, but then you must increase dry ingredients accordingly (flour) to avoid too liquid batters. Using solid pineapple gives better texture.
Q: Are pineapple cake bars gluten‑free or vegan‑friendly?
In their standard form, no. But you can use gluten‑free flour blends (ensure they self‑rise or adjust leavening) and vegan substitutes (egg replacers, vegan butter/oil). Be cautious—texture will differ and may need experimentation.
Q: Can I omit sugar or reduce it drastically?
You can reduce sugar somewhat, but too little sugar can affect tenderness, browning, and balance. Also pineapple provides some natural sweetness, but sugar is needed for structure too.
Q: Can I bake these in muffin tins instead of a sheet pan?
Yes, you could try mini “bar muffins” or loaf pan form. But baking time will change significantly, and edges will bake faster. Monitor carefully.
Q: Why do my bars turn soggy or collapse in the middle?
Possible causes: insufficient drainage of pineapple, underbaking, too much liquid, or cutting too early before setting.
Q: Can I make them ahead for event catering?
Yes, bake a day ahead and store refrigerated, then bring to room temperature before serving. Or freeze and thaw. For display, you may want to glaze just before serving for best presentation.
Sample Variations & Flavor Combinations
- Pineapple Coconut Almond Bars
Add ½ cup shredded coconut and ¼ cup sliced almonds; sprinkle extra coconut on top. The nutty and tropical combo is classic. - Pineapple Ginger Bars
Fold in 2 tbsp finely chopped crystallized ginger. The warm spice contrast with the sweet pineapple is refreshing. - Pina Colada Bars
Add a dash of rum or coconut rum (or rum extract) and include pineapple + shredded coconut. Optionally glaze with coconut cream icing. - Pineapple White Chocolate Bars
Mix in ½ cup white chocolate chips—ensure they’re well distributed so you get bits in each bar. - Vegan Pineapple Bars (experimental)
Use flax eggs or applesauce + vegan butter, and test a gluten‑free flour mix. Bake and adjust moisture carefully—start with small batch.
Tips to Improve Tenderness and Moisture
- Sift or aerate flour before mixing.
- Use room temperature eggs.
- Avoid overbeating.
- Use a thin layer of batter in a larger pan rather than thick batter in a small pan (thick cakes are harder to bake evenly).
- Use parchment paper so sides lift cleanly without sticking.
- Let cooling occur gradually to prevent internal steam collapse.
Marketing & Monetization Tips for a Baking Blog
Because you asked about high CPC and integrating monetization, here are some tips if you plan to turn your pineapple cake bars recipe page into an income generator:
- Use long‑tail keyword phrases like “easy pineapple cake bars recipe,” “portable dessert bars,” “tropical fruit bars recipe.”
- Create engaging photos or videos (step by step) to improve dwell time.
- Include internal links to related recipes (e.g. pineapple upside down cake, fruit bars, coconut cake).
- Use high‑quality images and offer a downloadable PDF or printable recipe card (you can gate this behind a small email subscription).
- Intersperse product affiliate links (e.g. parchment liners, baking pans, pancake trays, kitchen gadgets).
- Offer a video tutorial (YouTube embed) to boost engagement and watch time.
- Optimize meta titles and descriptions to include your target keyword (e.g. “Pineapple Cake Bars – Tropical Dessert Bars Recipe”).
- Use “recipe schema” structured data so search engines can show a rich snippet with rating/time etc.
- Promote on social media, Pinterest (especially for food visuals), food forums, cooking groups.
Full Rewritten Recipe Summary
Here’s a clean version you can drop into your blog or use in print form:
Pineapple Cake Bars
Ingredients: 2 cups flour, 2 tsp baking powder, ¼ tsp baking soda, ½ tsp salt, ¾ cup granulated sugar, ¼ cup brown sugar, ½ cup butter (melted) or butter/oil blend, 2 large eggs, 1 tsp vanilla, 1 cup crushed pineapple (well drained), optional ½ cup nuts / coconut / chocolate chips, optional glaze (1 cup powdered sugar + reserved pineapple juice)
Method: Preheat to 350 °F. Line a 9×13 pan. Whisk dry ingredients. In another bowl, mix sugar + butter, then eggs + vanilla. Stir in pineapple (and optional add‑ins). Fold in dry mixture until just combined. Bake about 25–35 minutes until toothpick comes out mostly clean. Cool, optionally glaze, then cut into bars.
Example Cost & Pricing Estimate (for home sale)
Let me illustrate a simple cost estimate so you can price your bars appropriately:
Say your ingredients cost (rough estimate): flour, sugar, butter, pineapple, etc. total $4 for the batch. If you get 24 bars, your base cost per bar is ~$0.17. Add packaging (foil wrap, box) $0.05, labor & overhead $0.10, so all‑in cost ~$0.32. You might sell each bar for $1.00–$1.50 depending on your market, yielding margin. Adjust for local currency, labor, transport, etc.
Offer bundles (e.g. 6 bars, discount), or gift boxes, to boost average check.
Final Thoughts
Pineapple cake bars are a versatile, crowd‑pleasing dessert with tropical flavor and easy portability. Whether you are baking for family, parties, or aiming to sell, mastering moisture control and proper bake timing is key. Use the variations and tips above to make your recipe uniquely yours. And if you run this on your blog or website, integrate those high‑value keywords, visuals, video, and monetization strategies to maximize both user experience and revenue potential.
If you like, I can also help you draft SEO titles / meta descriptions, suggest images, or generate a printable recipe card. Do you want me to do that next?