
Sourdough Starter: The Ultimate Guide to Making and Maintaining a Healthy Starter at Home
A sourdough starter is a natural leavening agent that has been used for centuries to bake delicious and healthy bread. Unlike commercial yeast, which is mass-produced, a sourdough starter is a living culture of wild yeast and lactic acid bacteria that helps dough rise naturally. If you’re passionate about baking and want to create authentic sourdough bread with a rich, tangy flavor and airy texture, learning how to make and maintain a sourdough starter is essential.
Why Sourdough Starter is Essential for Baking
A sourdough starter is the foundation of great homemade bread. It provides natural fermentation, which improves both the flavor and texture of baked goods. Unlike commercial yeast, which works quickly, a sourdough starter ferments dough slowly, resulting in a deep, complex taste that cannot be replicated with store-bought yeast. Additionally, sourdough is easier to digest because fermentation breaks down gluten and phytic acid, making nutrients more bioavailable.
Creating a healthy sourdough starter requires patience and consistency, but once you establish it, you’ll have a reliable natural yeast that can be used indefinitely with proper care. This guide will walk you through the entire process, from making a sourdough starter from scratch to maintaining and troubleshooting it for the best baking results.
Health Benefits of Sourdough Starter
Sourdough bread made with a natural starter offers several health benefits. The fermentation process enhances the nutritional profile of the bread by increasing the availability of vitamins and minerals such as B vitamins, iron, and magnesium. Since sourdough has lower gluten content compared to regular bread, it is easier on digestion, making it a preferred choice for people with mild gluten sensitivities.
Moreover, the lactic acid bacteria in a sourdough starter help produce acetic acid, which acts as a natural preservative. This means that sourdough bread stays fresh longer without the need for artificial additives. The lower glycemic index of sourdough bread also helps regulate blood sugar levels, making it a healthier alternative to conventional bread.
Ingredients and Tools Needed for a Sourdough Starter
To make a sourdough starter at home, you only need two simple ingredients:
- Flour: Use unbleached all-purpose flour, whole wheat flour, or rye flour. Whole grain flours provide more natural yeast and bacteria, helping the starter develop faster.
- Water: Use filtered or dechlorinated water, as chlorine in tap water can inhibit yeast growth.
Essential Tools
- Glass or plastic jar: A clear container allows you to monitor the starter’s activity.
- Wooden or silicone spoon: Avoid metal, as it can react with the acidic starter.
- Digital scale: Measuring ingredients by weight ensures consistency.
- Clean towel or lid: Covers the jar to prevent contamination while allowing airflow.
Step-by-Step Guide to Making a Sourdough Starter
Day 1: Mixing the Ingredients
In a clean jar, mix:
- 60 grams (½ cup) of whole wheat or rye flour
- 60 grams (¼ cup) of filtered water
Stir well to form a thick paste. Cover the jar loosely with a towel or lid and let it sit at room temperature (21-26°C or 70-80°F) for 24 hours.
Day 2: Checking for Activity
After 24 hours, check for bubbles or a slightly sour smell. If no bubbles are visible, stir the mixture and let it sit for another 12-24 hours. If you see small bubbles, proceed to the next step.
Day 3-7: Feeding the Starter
For the next five days, follow this feeding routine:
- Discard half of the starter (about 60 grams).
- Add 60 grams (½ cup) of unbleached all-purpose flour.
- Add 60 grams (¼ cup) of filtered water.
- Mix until smooth and let it rest at room temperature.
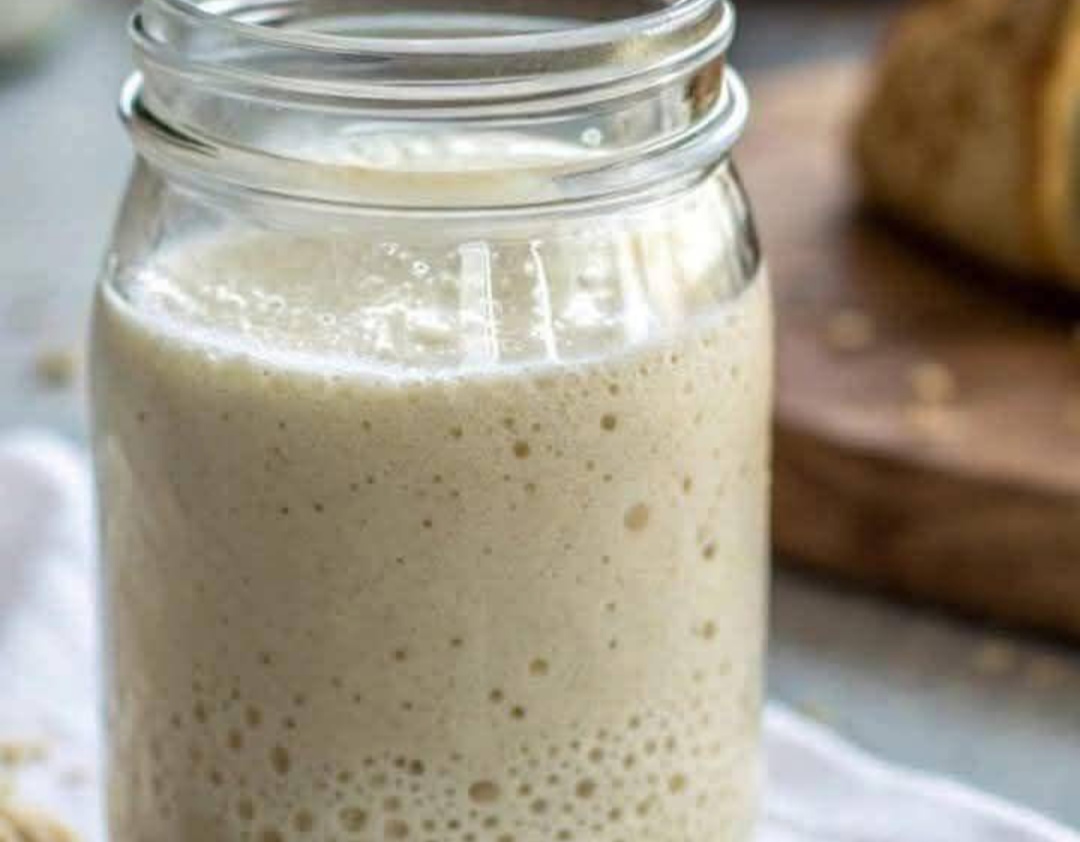
By day 5 or 6, your starter should have doubled in size, smell tangy, and have a bubbly surface. If it still looks weak, continue feeding for a few more days.
How to Know When Your Starter is Ready
A mature sourdough starter should pass the float test: Take a small spoonful of starter and drop it into a bowl of water. If it floats, it is ready to bake with. If it sinks, continue feeding for a few more days.
How to Maintain a Healthy Sourdough Starter
Once your sourdough starter is active, you need to maintain it for long-term use. Here’s how to keep it healthy:
- Daily feeding (if stored at room temperature): Feed your starter once a day using the same flour-to-water ratio.
- Weekly feeding (if stored in the fridge): If you don’t bake daily, store your starter in the refrigerator and feed it once a week. Before using it, bring it to room temperature and feed it at least twice to reactivate it.
How to Revive an Inactive Starter
If your starter becomes weak or inactive, follow these steps:
- Discard most of the starter, leaving only a small amount.
- Feed with whole wheat or rye flour for extra nutrients.
- Keep the jar in a warm place (75-80°F) to boost activity.
- Feed twice a day until it becomes bubbly and active again.
How to Use Sourdough Starter in Baking
Sourdough starter can be used in a variety of recipes, including:
- Classic sourdough bread: The most popular use for a mature starter.
- Pancakes and waffles: Adds a delicious tangy flavor.
- Pizza dough: Creates a chewy, flavorful crust.
- Muffins and cakes: Enhances texture and digestibility.
Basic Sourdough Bread Recipe
Ingredients:
- 500 grams (4 cups) bread flour
- 100 grams (½ cup) active sourdough starter
- 10 grams (2 teaspoons) salt
- 350 grams (1 ½ cups) filtered water
Instructions:
- Mix the starter and water in a large bowl. Add the flour and mix until combined. Cover and let rest for 30 minutes.
- Add salt and knead the dough for 10 minutes until smooth.
- Let the dough rise at room temperature for 4-6 hours, folding every 30 minutes.
- Shape the dough and place it in a proofing basket. Cover and refrigerate overnight.
- Preheat the oven to 475°F (245°C) with a Dutch oven inside.
- Bake for 30 minutes covered, then 15 minutes uncovered until golden brown.
Common Sourdough Starter Problems and Solutions
Mold Growth
- Solution: Discard the starter and start fresh. Always use a clean jar and filtered water.
Hooch (Liquid on Top)
- Solution: Stir it back in if clear; discard it if dark or smells bad.
No Rise or Bubbles
- Solution: Increase feeding frequency, use whole grain flour, and keep it in a warm place.
Final Thoughts
A sourdough starter is a powerful and natural way to bake delicious, nutritious bread at home. With patience and proper care, you can maintain a starter for years and enjoy endless baking possibilities. Whether you’re a beginner or an experienced baker, this guide provides everything you need to create and maintain a successful sourdough starter. Start today and experience the joy of homemade sourdough bread!